
AWS provides world-class cloud service. From hosting your application to providing scalable servers. From database controls to lighting fast services all packaged in one account.
While using the AWS services, one should be very careful and should read all the terms and conditions and tier usage and limit before stepping onto anything. Because in AWS 99.99% services are chargeable and it doesn’t have fixed cost, the more you use the more you pay. Basically AWS doesn’t let your site go down in the event of user failed to pay bills or the account passes the threshold limit. But that does’t mean, AWS is always that heavy on pocket, if you use smartly, it is one of the best thing that you will encounter in the cloud service market.
In this post, I’ll talk about how to setup AWS EC2(Elastic Compute Cloud) instance with Ubuntu 18.04 AMI. But before that, let me walk you through with little bit of terminology that we are going to use very often when we will be talking in context of AWS.
AMI – Amazon Machine Interface is pre-defined machine configuration which will act as a template that will be used to create an instance. The information like OS, version, extra components required are defined in AMI.
Instance – An instance is basically referred to a unit service which will act as a server.
SSH – Secure shell is a command line utility which will allow you to access your server. SPOILER ALERT – You won’t get any GUI for Linux based instances.
Security Group – A security group is a set of configuration which will be used to provide restrictions and authorities on the accessibility of your instance.
Let’s begin creating the instance on AWS.
Step 1
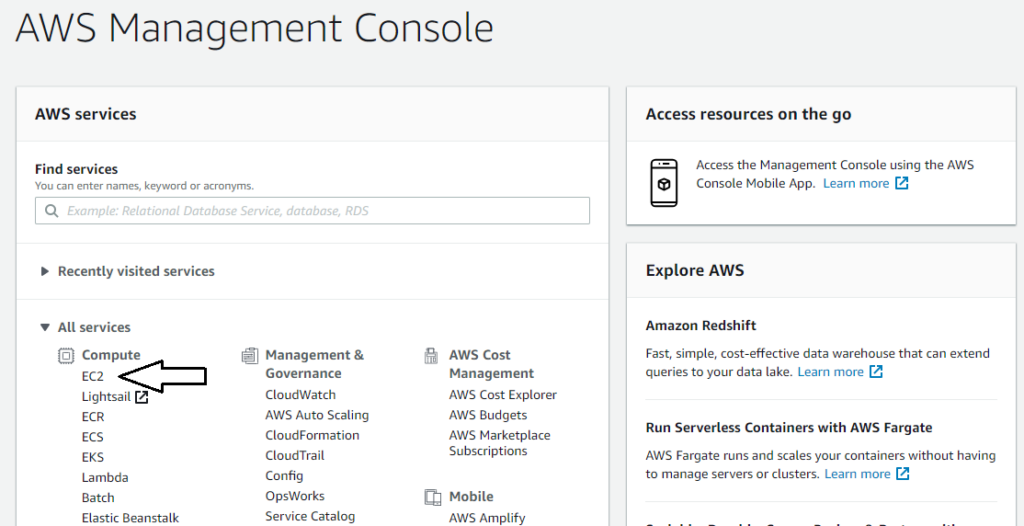
Login to your AWS account and navigate to
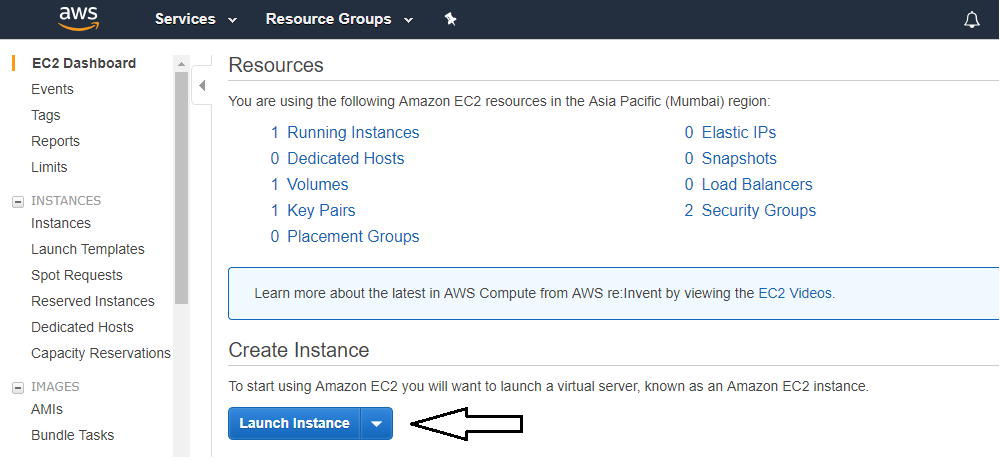
EC2 service section. After navigating to the screen, you will find multiple options regarding EC2 instances like how many instances AWS is running, how many volumes are active, how many security groups are acting and so on.
Step 2
Select Launch Instance option. A wizard will open and will guide you to launch an AWS instance.
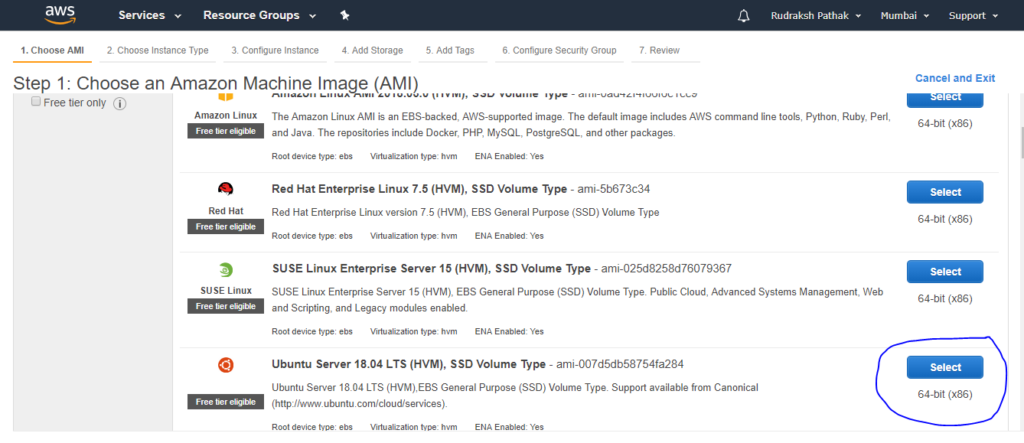
Step 3
In the first step of wizard select the AMI of your choice. Please note, if you are running servers under free tier eligibility, make sure you have the free tier eligible tag on the AMI. For this tutorial, we will select the most popular AMI Ubuntu Server 16.04 LTS (HVM), SSD Volume Type.
Step 4
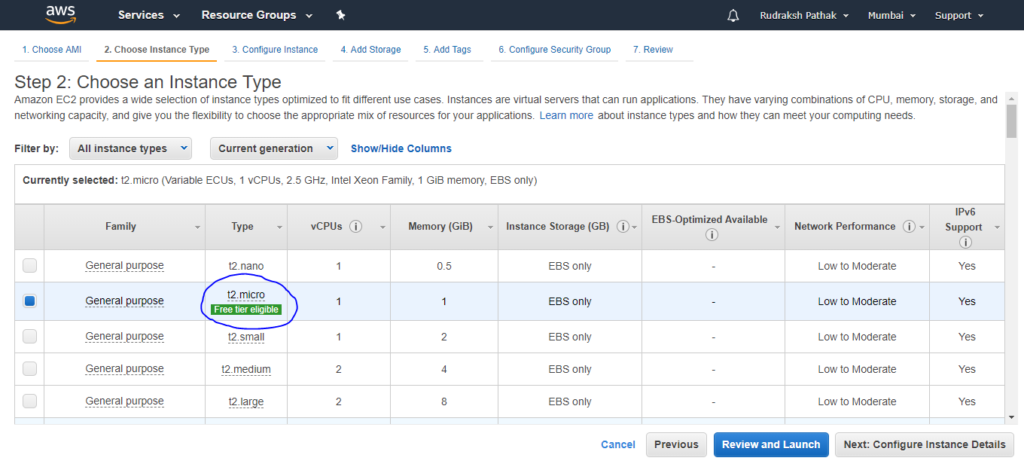
In the second step, Select the type of instance. The type of instance basically signifies what kind of hardware configuration do you want in your instance. You can select one of the available configuration. For this tutorial, we will stick to the type which is available in the free tier i.e.
t2.micro.
Step 5
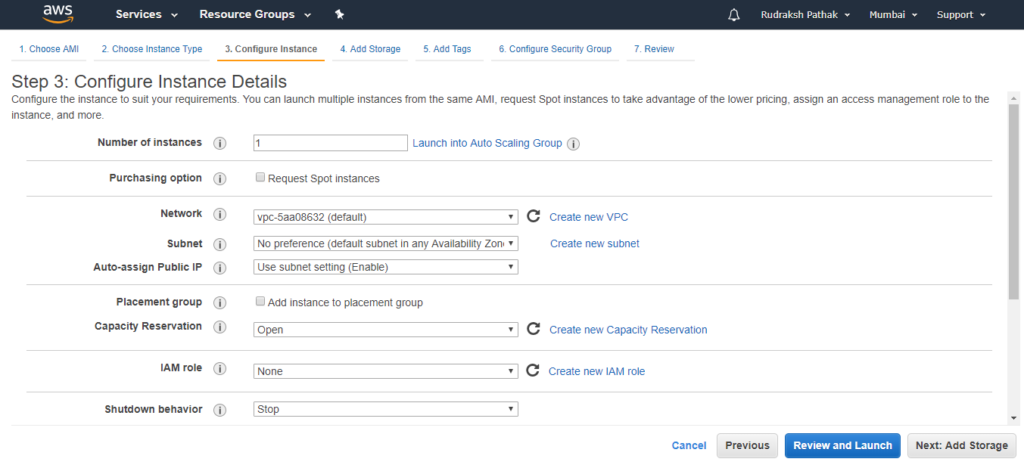
In the third step, you can configure the settings of your instance. You can configure the auto-scaling group here, VPC networks, IAM role based authentication and more. But for simplicity, just continue with the default settings.
Step 6
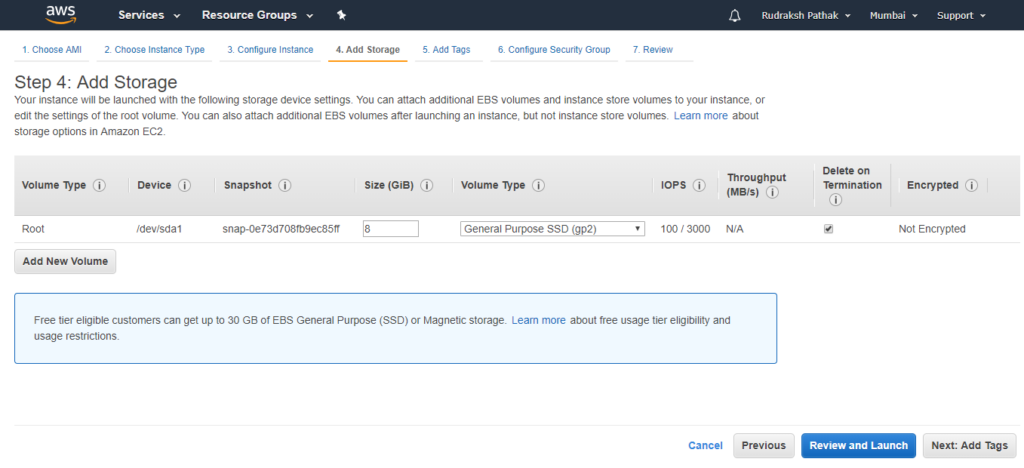
In the fourth step, we will add the storage in our instance. By default AWS instance consumes 8 GB of SSD storage, but you can go up-to 30 GB of total storage in free tier.
Step 7
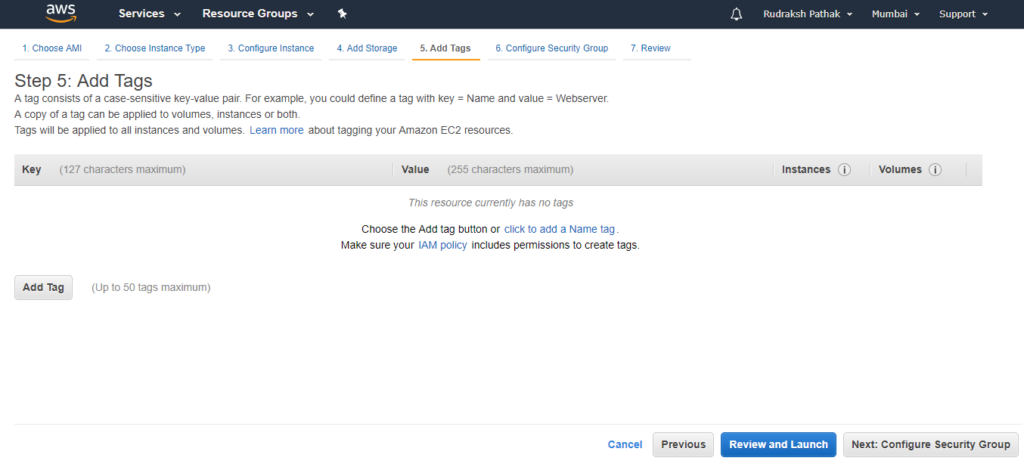
In this fifth step, you can add tags of your choice for your instance. This step is optional so we will skip this part.
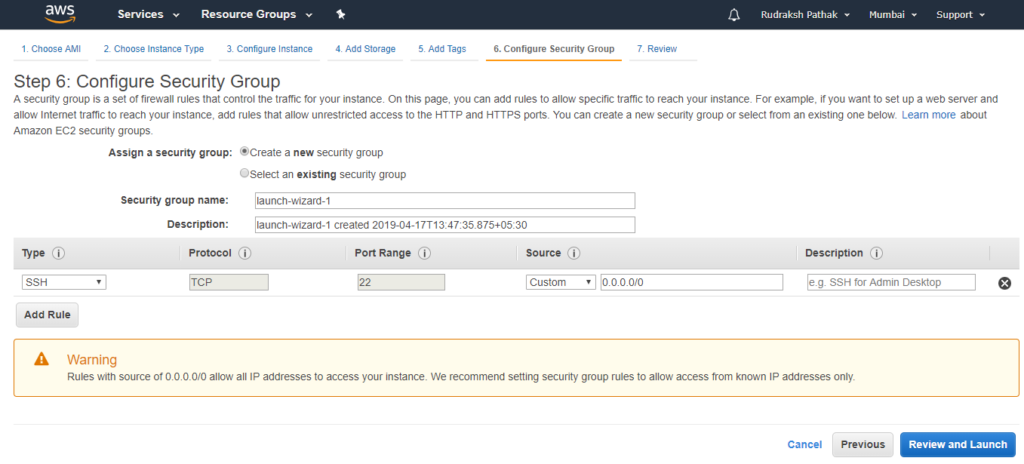
Step 8
In the sixth step, we will configure the security group. A security group is basically a set of rules and restrictions. We can both create a security group or select an old security group which is actively working with other instances.
The security group can be used to define which ports are accessible to which IPs. We can make them public if it is the requirement or we can completely make it private in order to provide extra layer of security.
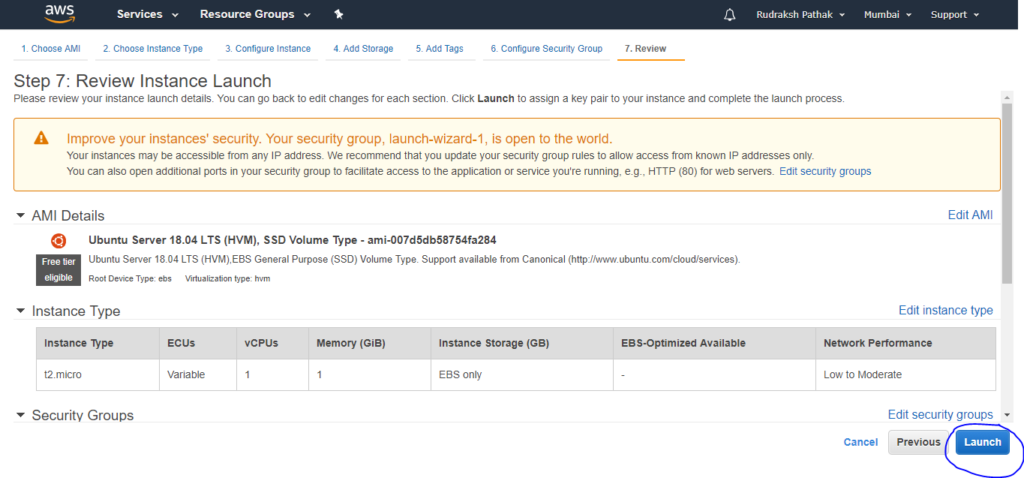
Step 9
Finally, you can review the configurations you just chose and launch the instance.
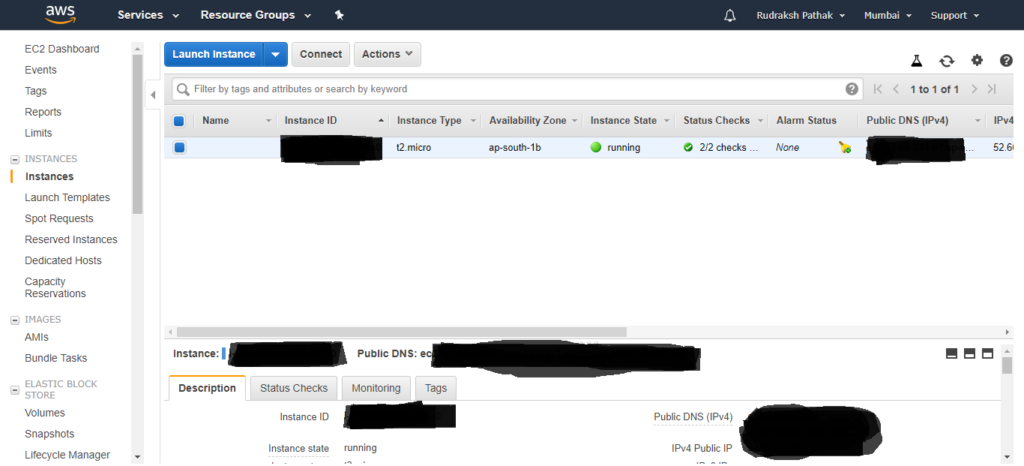
After you have successfully launched your instance, you can see it in the list of instances. The active and up-and-running instance will have running instance. By selecting the instance you can also check the key details related to instance like, public DNS, private IP and more.