
Security is one of the most important aspect of any application. Today we are going to learn about how certificate based authentication technique is employed in order to provider more comprehensive security to enterprise level application.
What is required to pursue this process –
- Trusted Self signed Root Certificate
- Server side certificate (Self signed SSL)
- Client side certificate
- MakeCert utility to generate certificates for local development purpose
Step 1
We will begin with downloading the makecert utility. We have multiple options to generate the certificates but for the sake of simplicity, we ill be using this utility to generate certificates. Copy this utility in a folder, choose a location where you will be storing your certificates.
Run the following command to create the root certificate. Let me explain this command. In this command, we are invoking the makecrt utility and passing the parameters –
-n – X500 Certificate subject name
CN=RudraRootCA – This will be the name of certificate
RudraRootCA.pvk – This will be the name of private key file
RudraRootCA.cer – This will be the name of certificate file
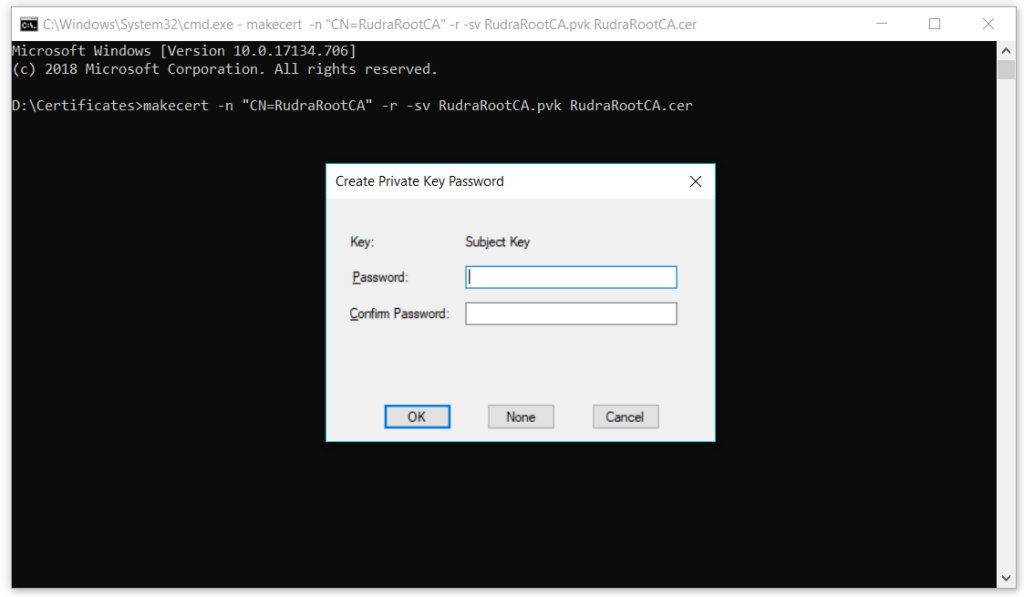
makecert -n "CN=RudraRootCA" -r -sv RudraRootCA.pvk RudraRootCA.cer
When you run the above command you will see a window popup generated by the makecrt tool asking for private key password. Just type in any password you want and proceed
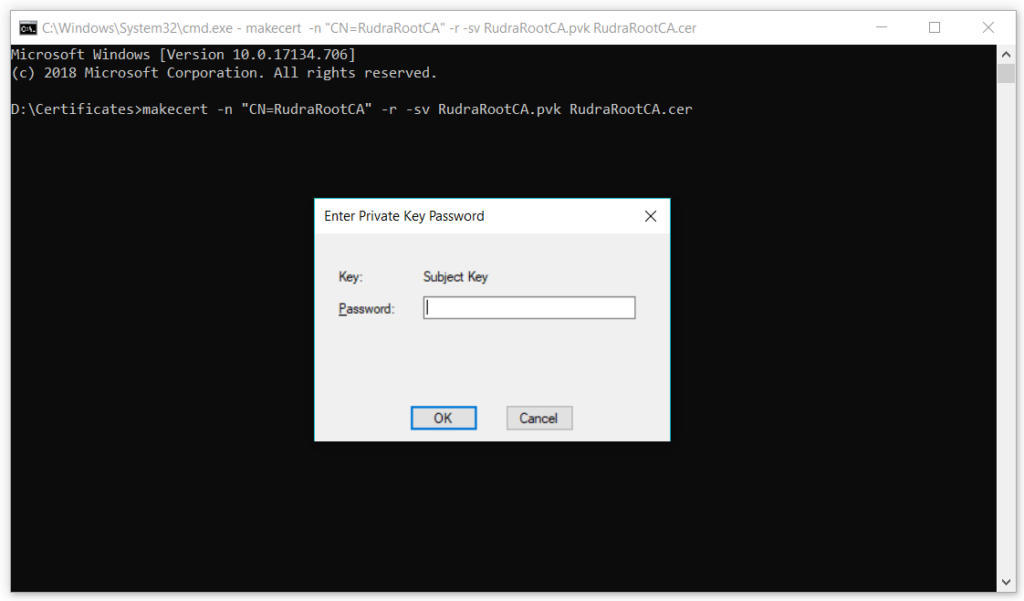
It will again ask for password on the next screen that you just created to generate the .cer file. Just type in the password and proceed
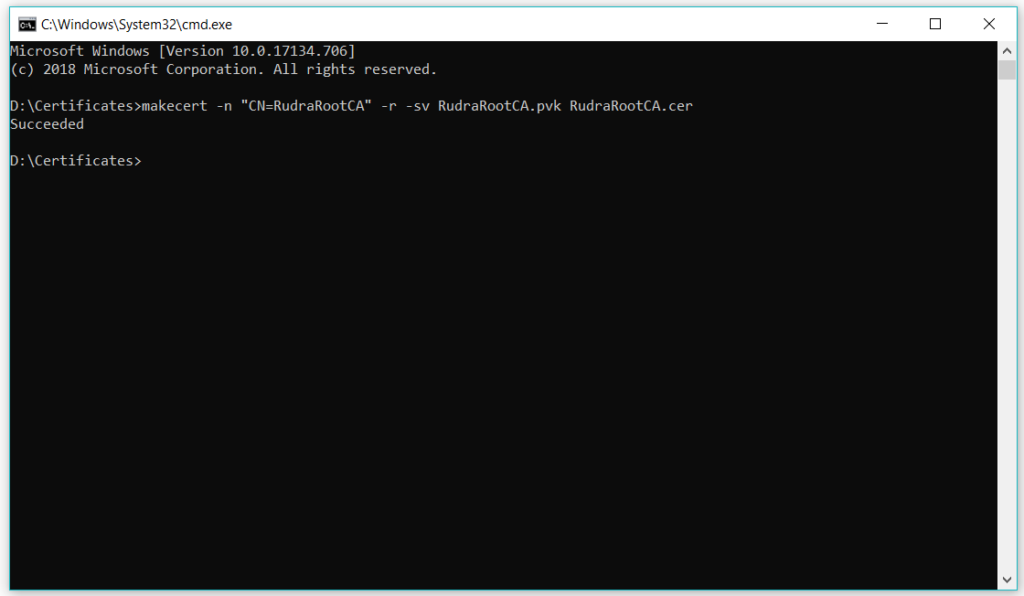
After that, if all goes well you will see the success message on the console screen –
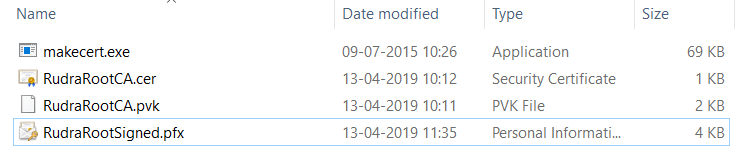
After completion of these steps, you will have the following files in your directory –
1. makecrt utility
2. RudraRootCA.cer root security certificate file
3. RootRootCA.pvk private key file

Step 2
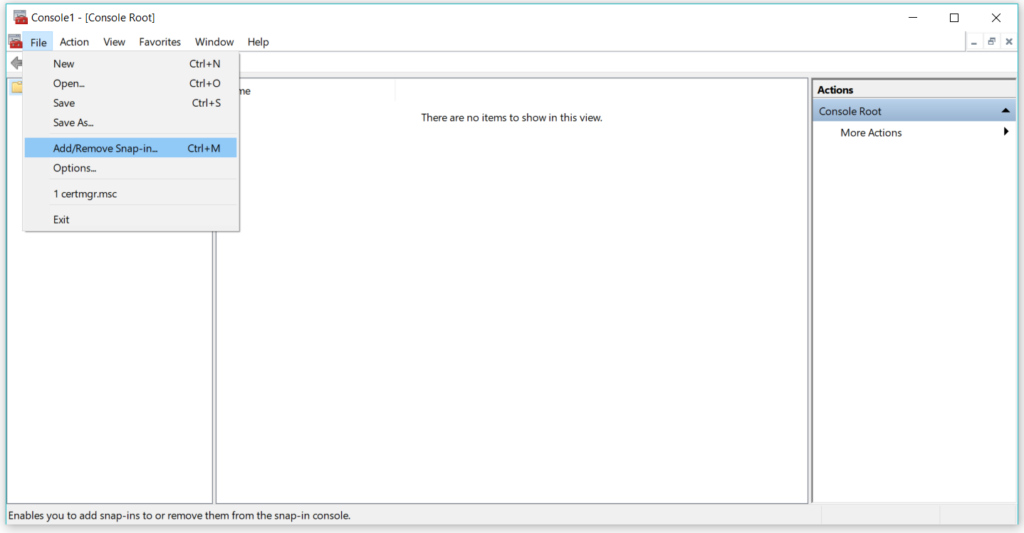
Now lets begin with the process of importing this certificate and adding in Trusted Root Certification location.
Press Window key + R and type mmc to open Microsoft Management Console. After opening the mmc, click on File->Add/Remove Snap-in
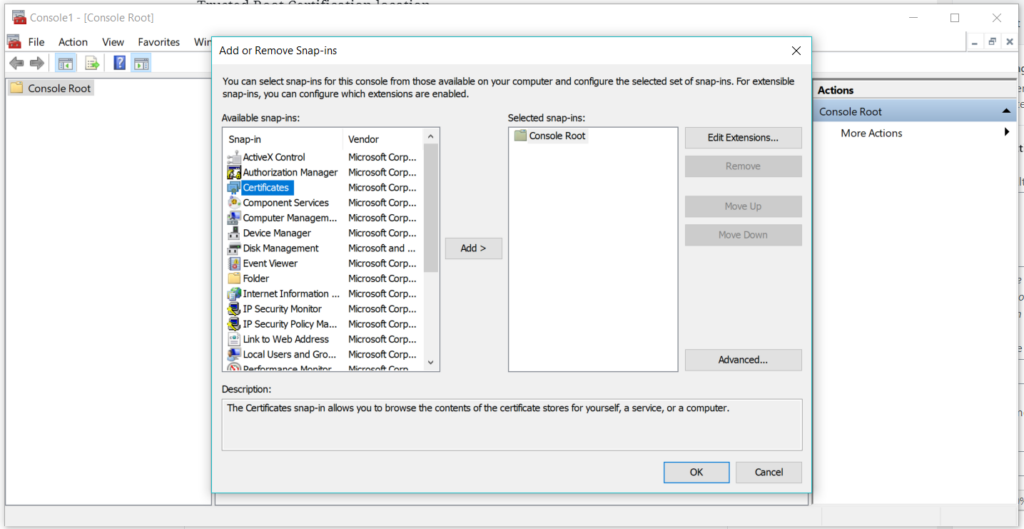
Select certificates from the options –
Select Computer account option from the choices available –
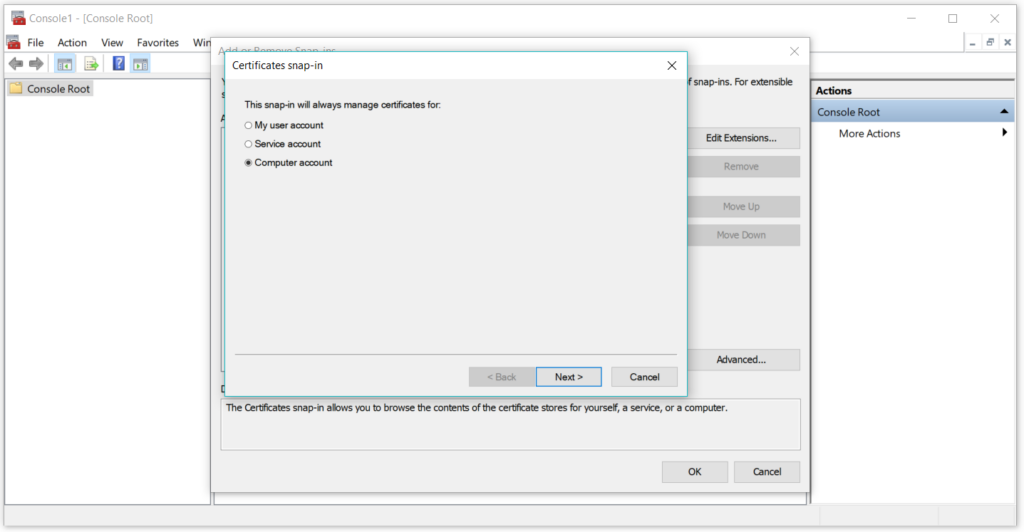
Select Local computer option from the choices available and then click ok to close the wizard.

Step 3
Now you will have a
certificates (Local Computer)option in the left sidebar. Expand it and then you will see Trusted Root Certification Authorities. Expand it and then you will see the certificates.
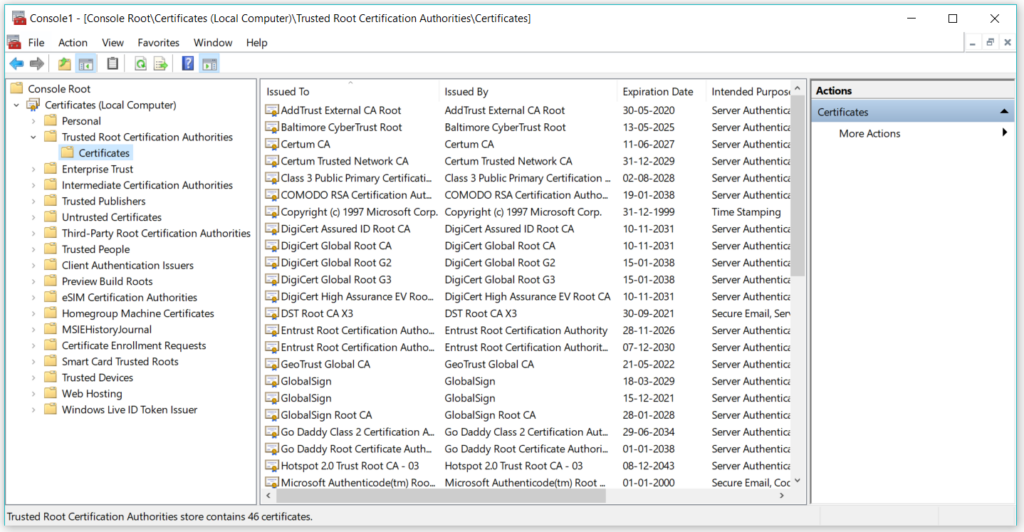
Right click on Certificates option and select All Tasks -> Import.

A certificate import wizard will get open –
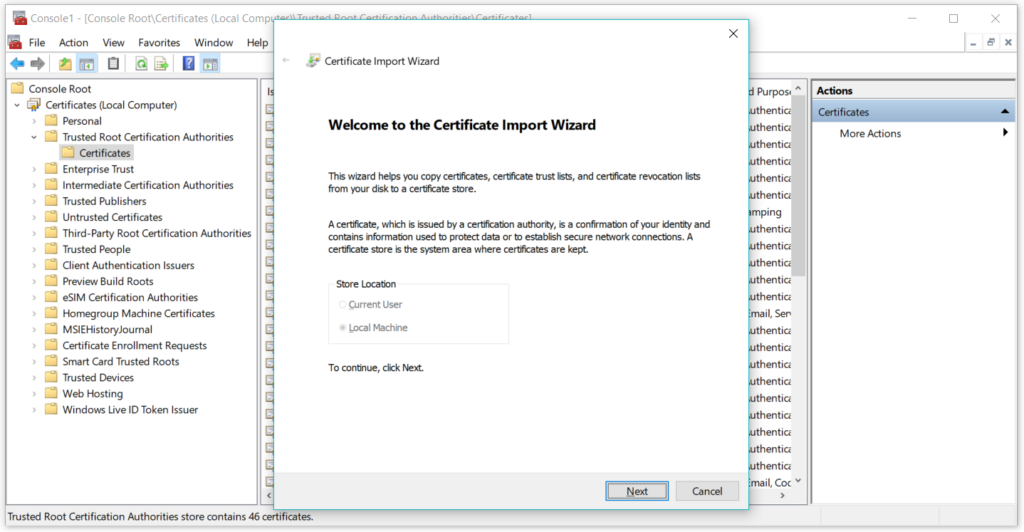
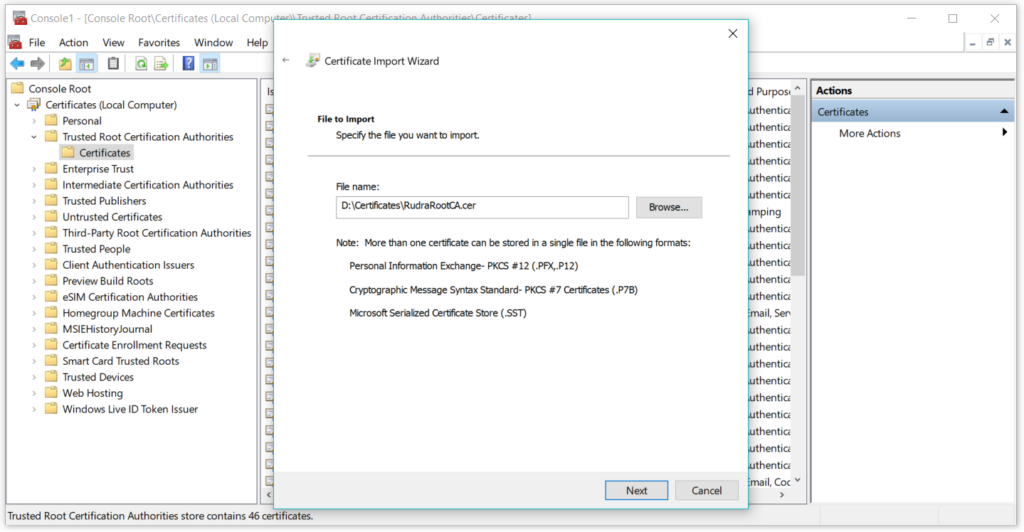
In the next step, select the
RudraRootCA.cerfile that we just created in the earlier steps.
Select the place all certificates option

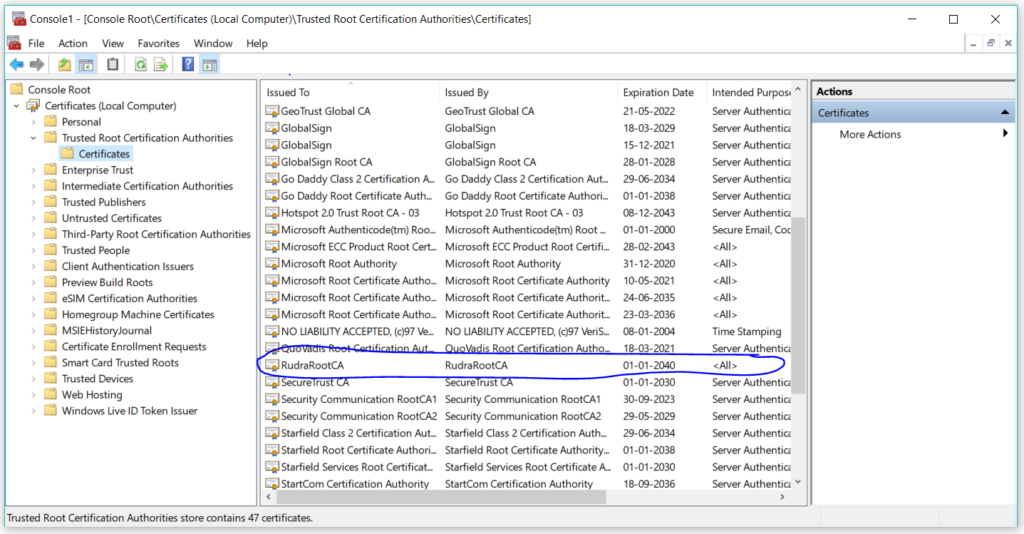
After that just click on finish and you will see a popup saying that certificate import was successful. You will see your certificate in the list –
Step 4
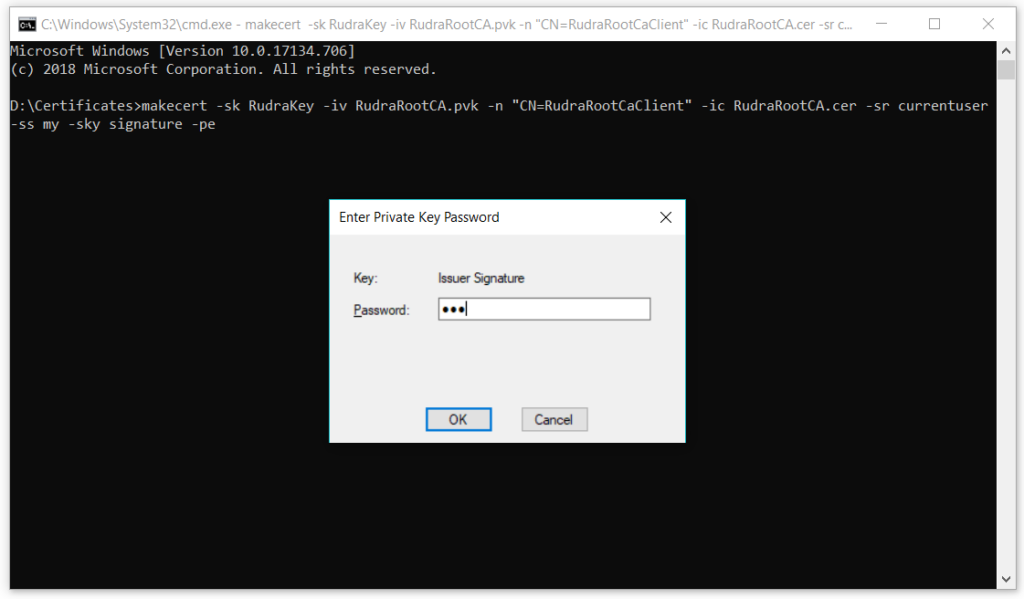
Now goto your certificates directory where you have the makecrt utility and run the following command –
makecert -sk RudraKey -iv RudraRootCA.pvk -n "CN=RudraRootCaClient" -ic RudraRootCA.cer -sr currentuser -ss my -sky signature -pe
Enter the private key password that you created in the earlier steps to generate the Client certificate signed by the root certificate –
After that if all goes well, you will see a successful message on the console and you can see your certificate in the Microsoft Management Console utility. To check it follow the steps –
Step 5
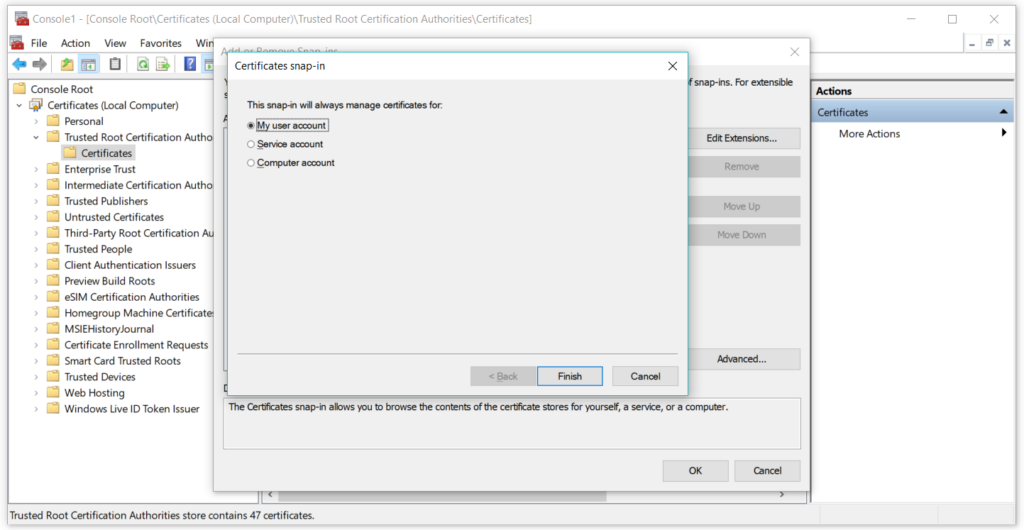
Open Microsoft Management Console by pressing Window Key + R and type mmc and hit enter. Click on File -> Add/Remove snap-in
In the popup select certificates. From the choices select My user account and then click ok.
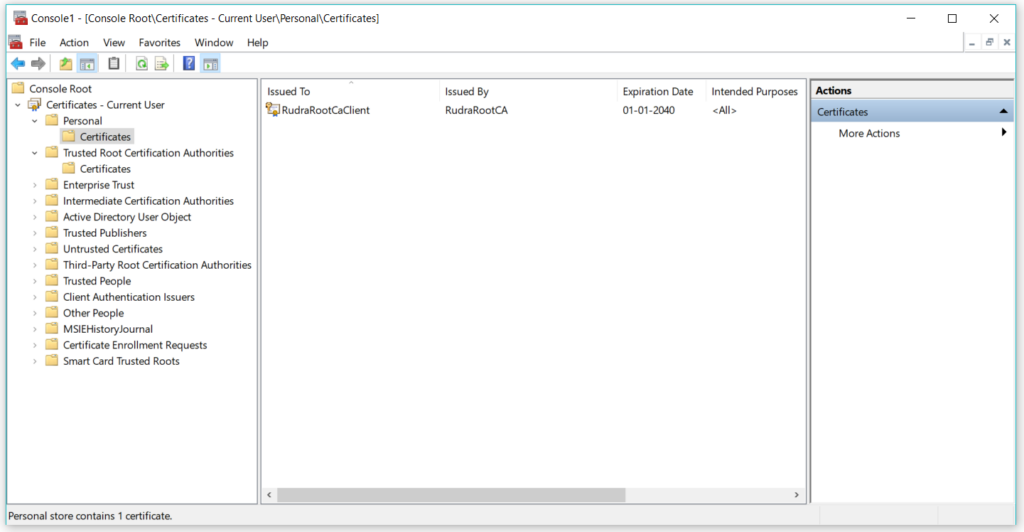
Expand the certificates – Current User, you will see the certificate you just created –
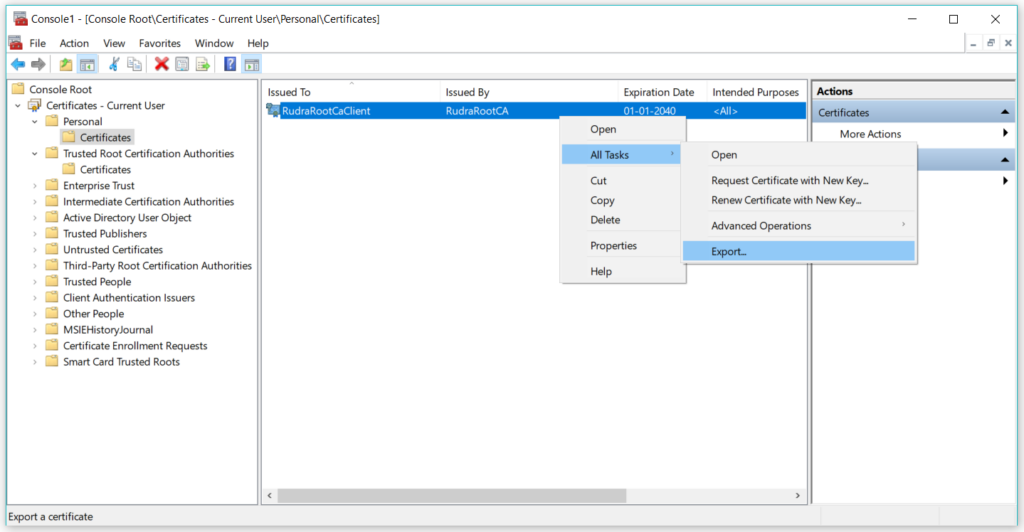
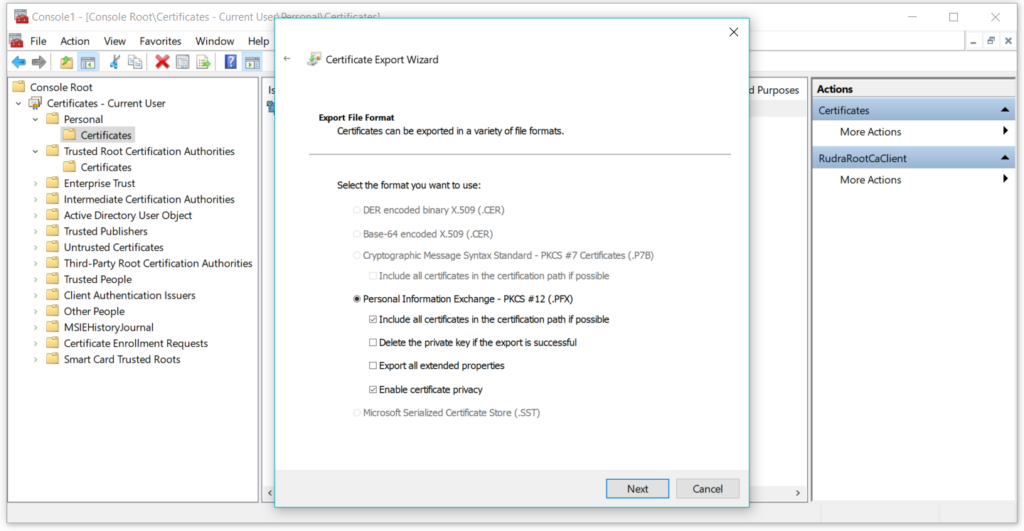
Now we will begin the process of exporting these certificates. Right click on certificate -> All Tasks -> Export
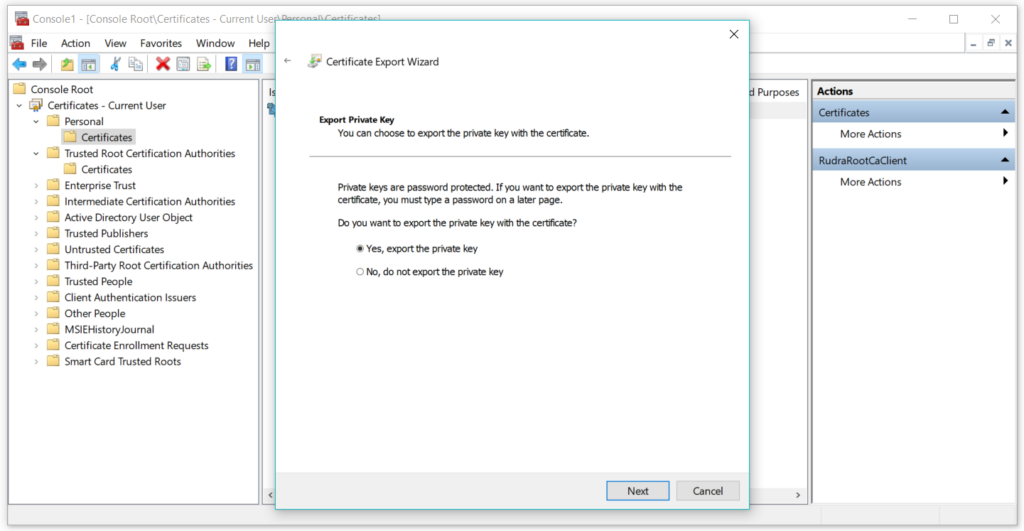
Select the option, exporting with private key-
Select the PFX option from choices –
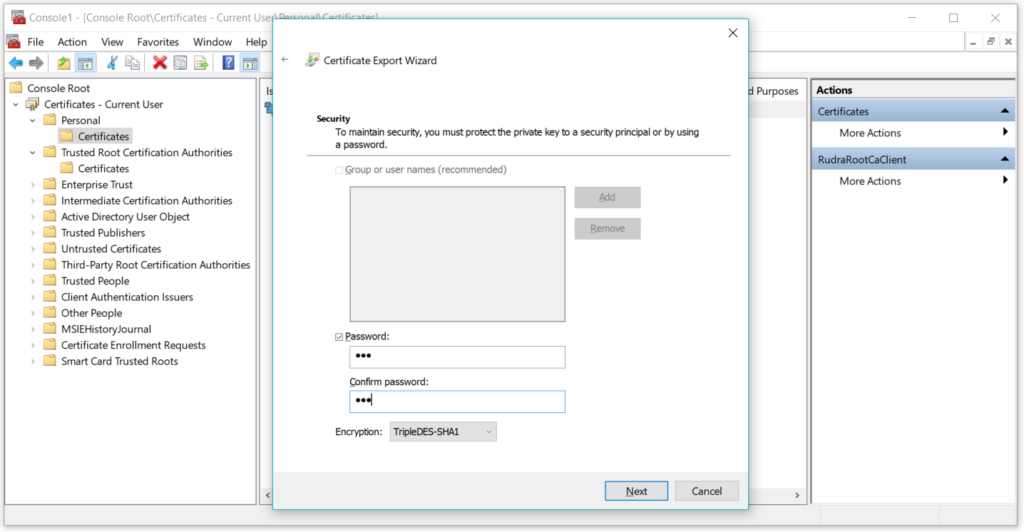
On the next step, set the password whatever you desire –
On the next step, set the file name and location and click on Finish. On successful export, you will see the following files in your certificates directory –
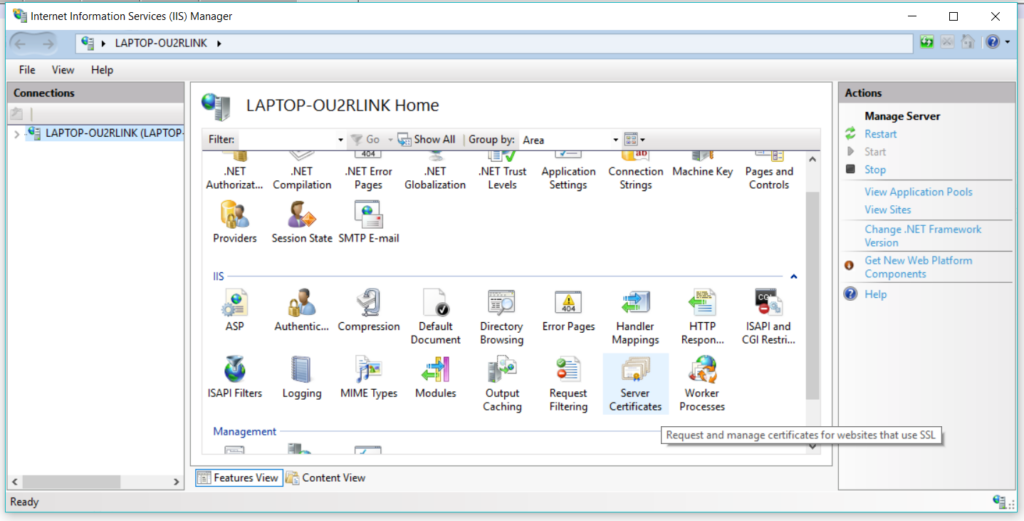
We are done working with certificate files and trusted root authorities. Lets start configuring the IIS to accommodate the settings of server and client certificates.
Step 6
First of all, make sure that your IIS services are enabled and up and running. Now open the IIS manager.
From the root, select the Server certificates option –
Step 7
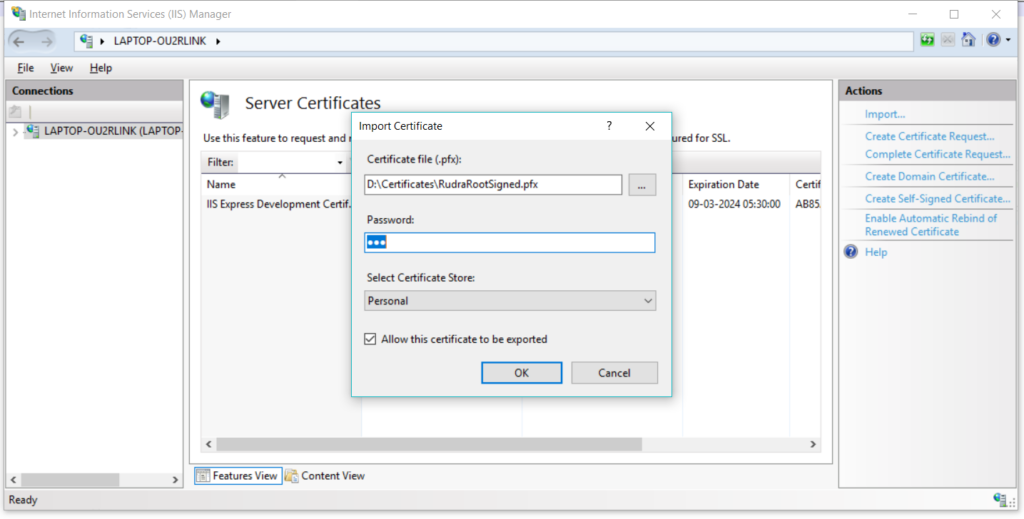
From the menu available on right side, select the import option. A new popup window will open where you have to specify the path of the signed certificate file and password.
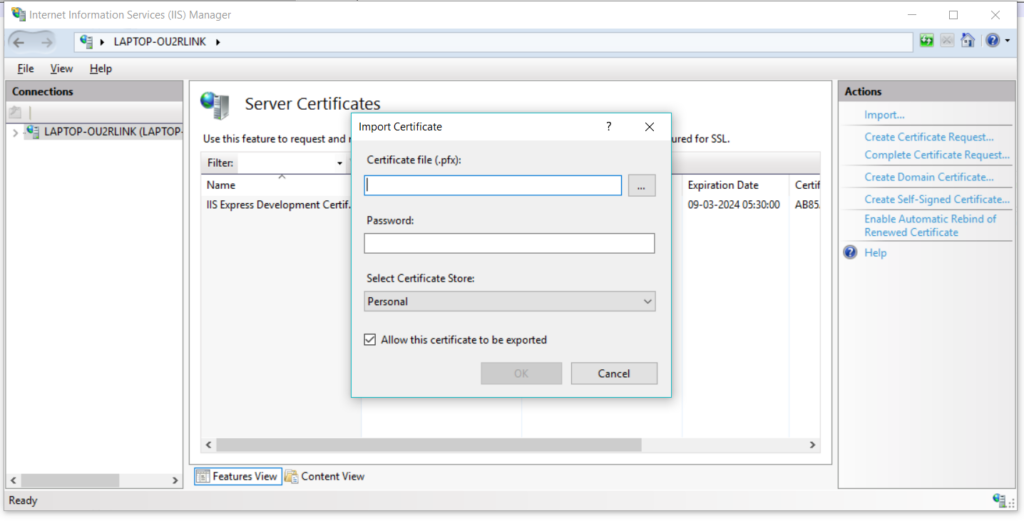
Select the .pfx file that you just create and specify the password you used while creating it –
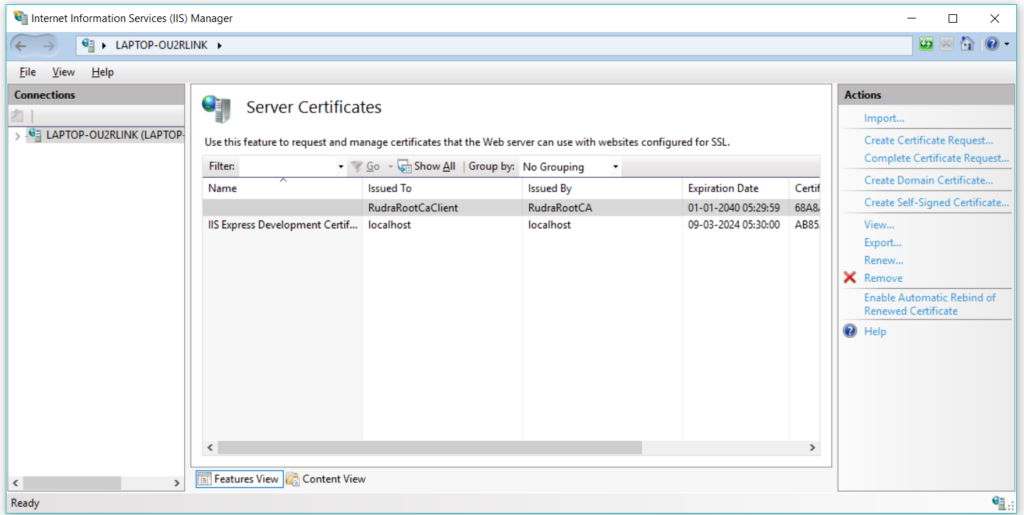
After that you can see your certificate in the list –
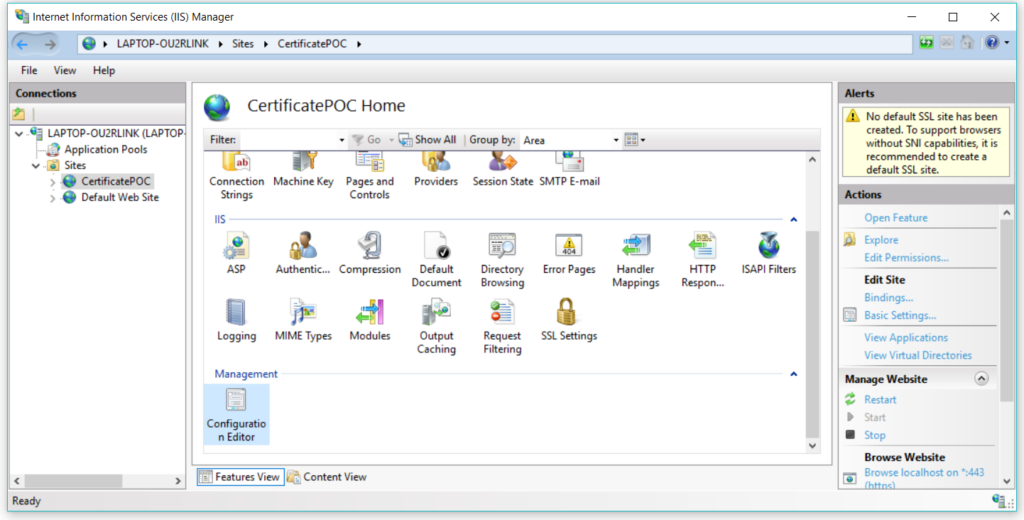
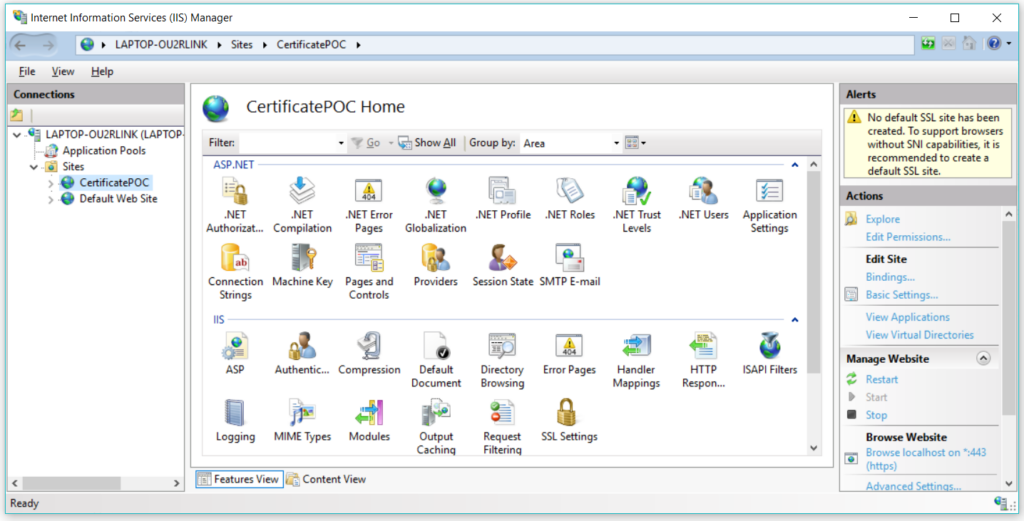
For the testing purpose, I’ve already included a ASP.NET Web API build in the IIS server. Now lets configure this project to authenticate using the certificates.
Step 8
Select the site and click on Configuration Editor –
In the Section drop down navigate to system.WebServer -> Security -> Authentication and select iisClinetCertificateMappingAuthentication
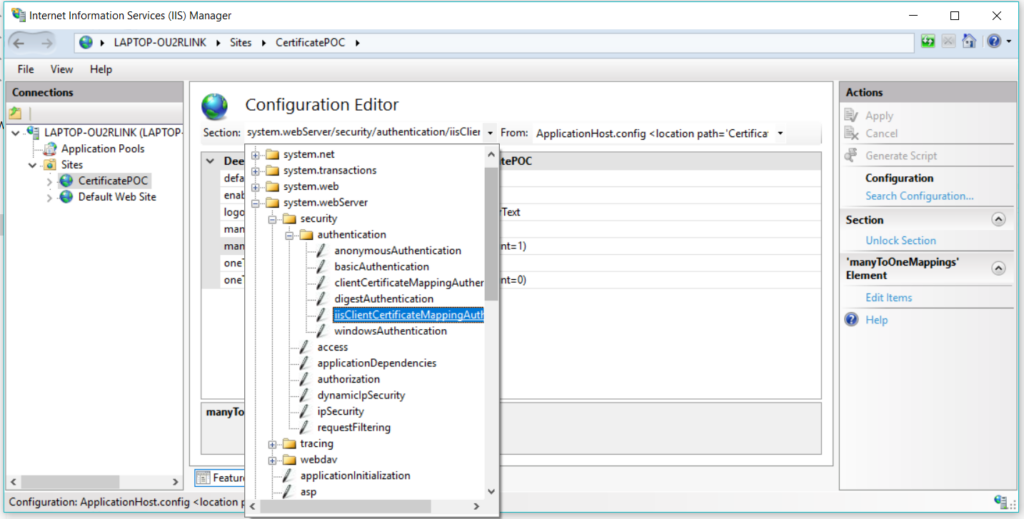
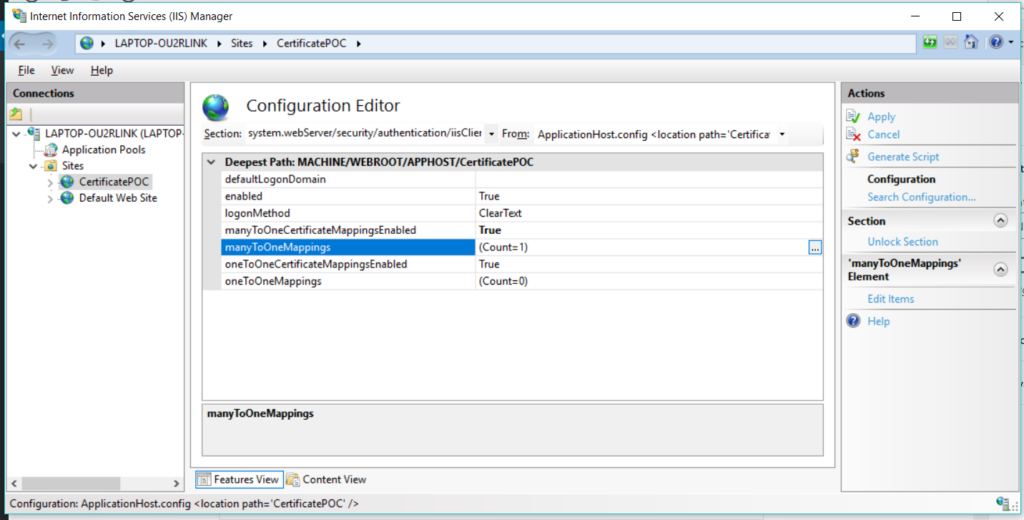
Set true in enabled option, set manyToOneCertificationMappingEnabled to true and click on the ellipsis icon on the option manyToOneMappings
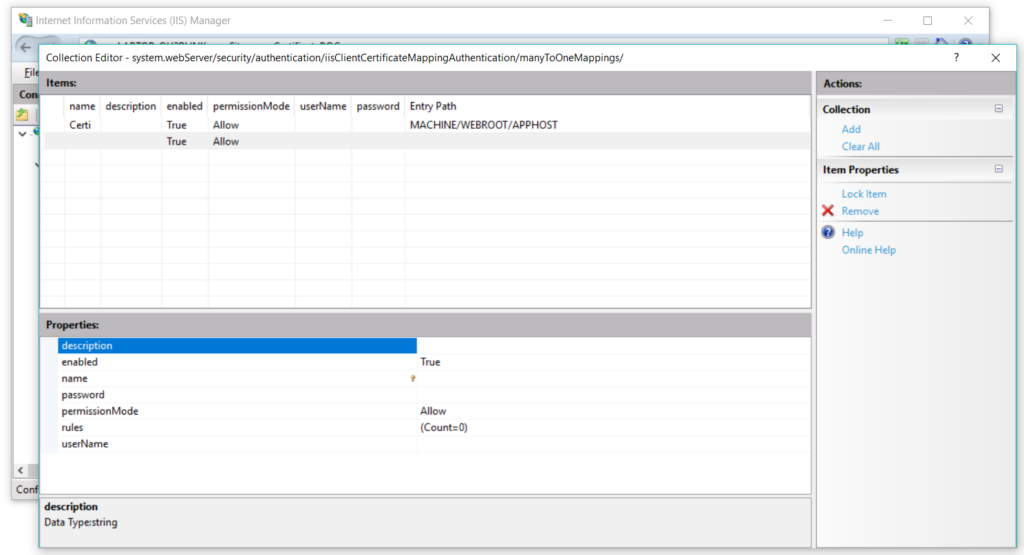
Now click on Add, and enter the required details –
And you are done setting the configurations in this setting option. As of now if you open the project in a browser, it will run because till now we haven’t configured the IIS to make certification authentication mandatory. So let’s do it now.
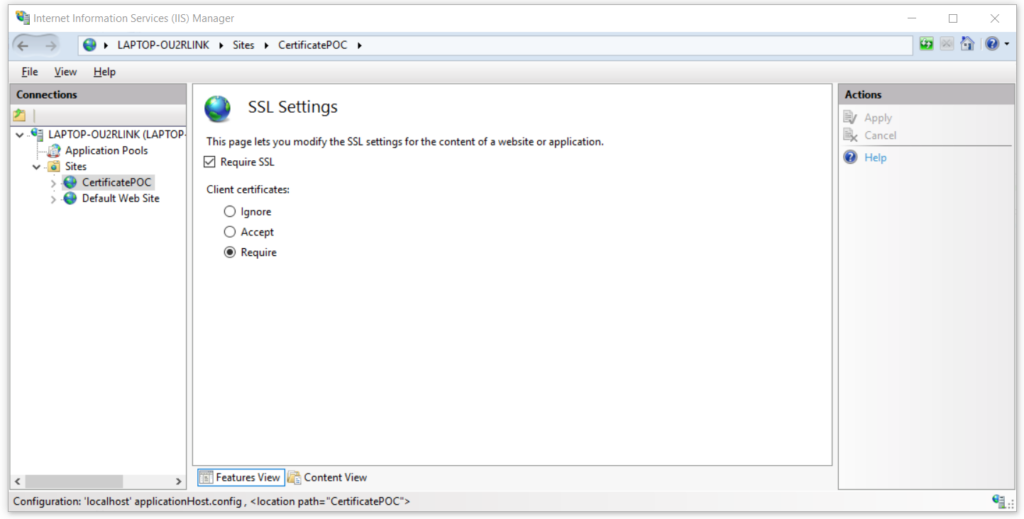
Step 9
Select the site and click on SSL settings –
In the configuration panel, select the option required and save the changes by clicking on apply link available on the right side menu –
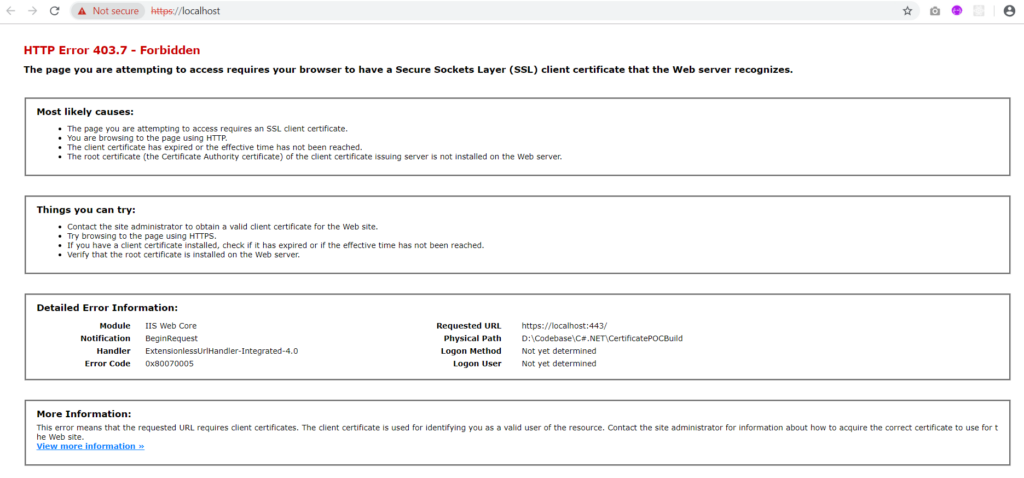
Now if you try to open the web it will give you following warning –
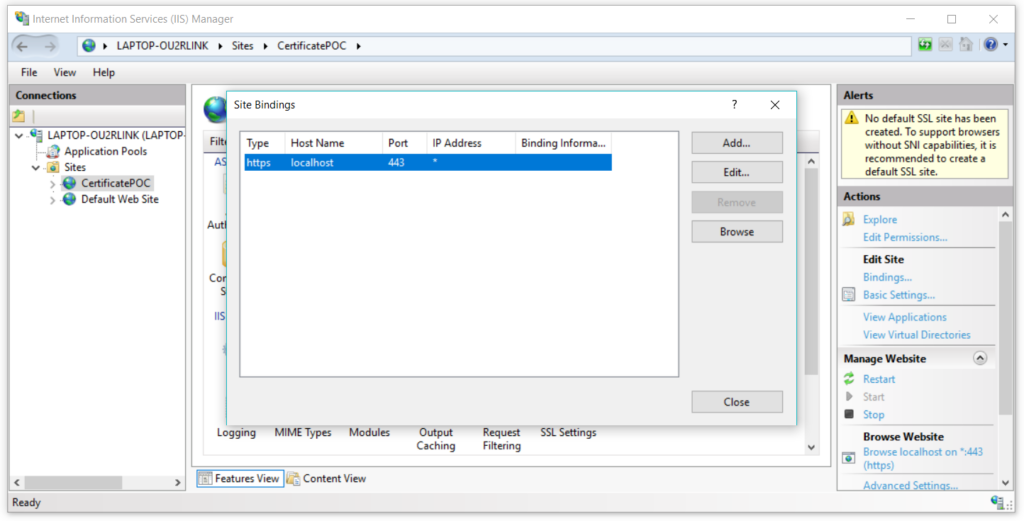
Step 10
Now lets setup the server certificate for this project. Select the project, right click on it and select Edit bindings option –

From the popup select the option which has port 443 –
Set the hostname, and select the SSL certificate from the dropdown that we just created and click on ok –
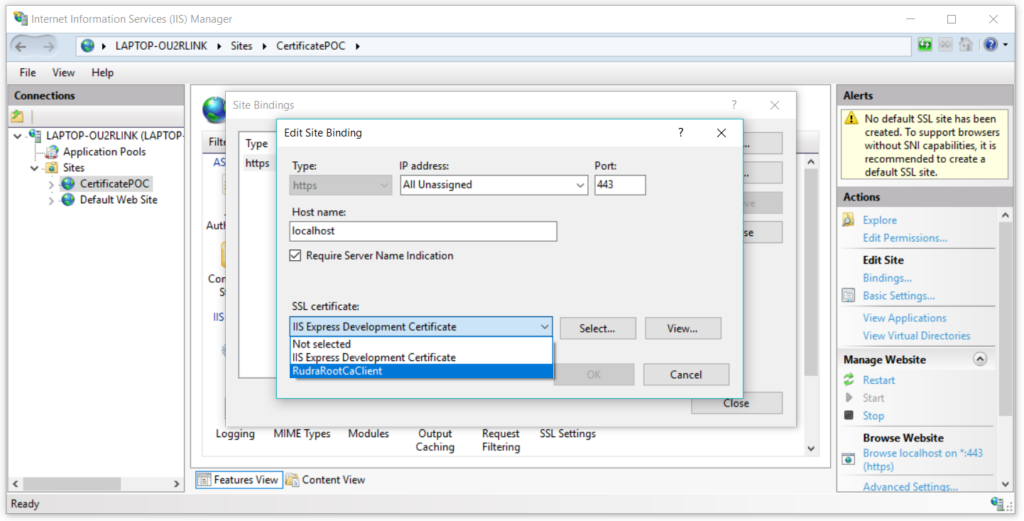
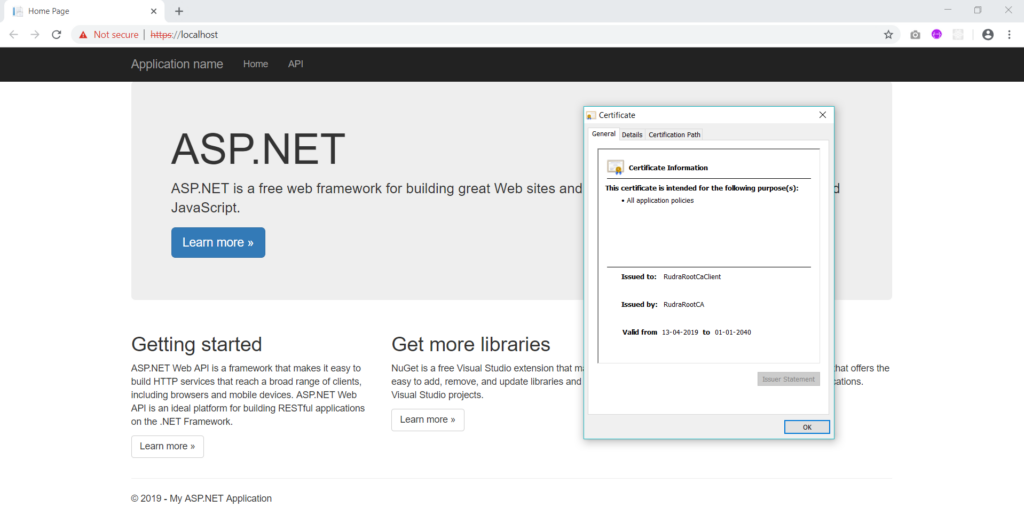
We have already installed the client certificate in out Trusted root authority, so we are good to go. Now we will try to access the website using the client certificate authentication. When we will open the project, it will prompt us with a window to select the certificate –
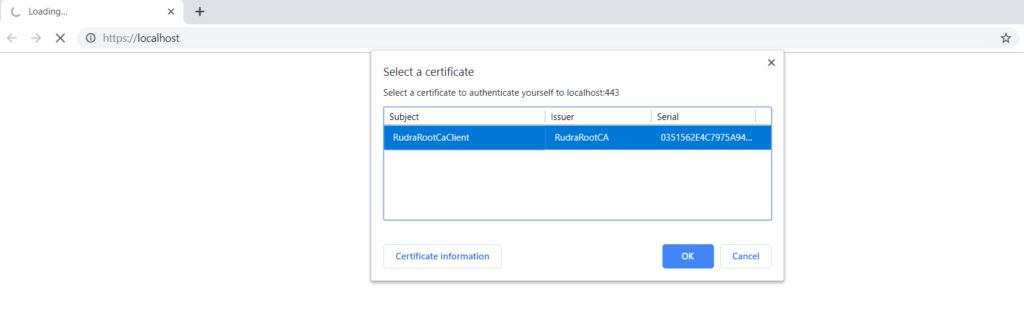
Click on Ok, and you are good to go. You have successfully varified your authenticity using the client certificate. You can also click on the lock icon to view the certificate details –